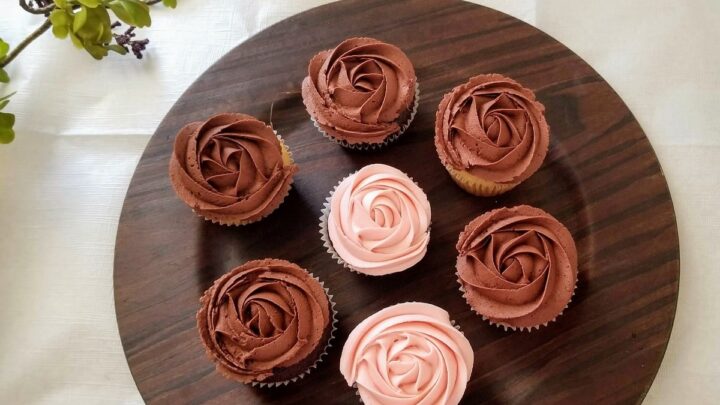

I love baking cupcakes. It’s super fun, and the smell of warm, freshly-baked cupcakes coming out of the oven is hard to beat!
Unless, of course, I happen to burn the bottom. This has probably happened to most of you out there as well, and even though it’s not the end of the world, it can be really frustrating and annoying.
Luckily, there are quite a few hacks to prevent burning the bottoms (or tops) of your beloved cupcakes while they are getting ready in the oven.
You can double stack your baking sheet and use a light-colored one to prevent burning your cupcake bottoms. You can also bake your cupcakes with the liners to further shield them from the below heat.
If you want to read up on those helpful cupcake-baking tips and tricks, make sure to keep reading.
How Do You Keep the Bottom of Your Cupcakes from Burning?
There are numerous ways to prevent burning the bottoms of your cupcakes. Some are easier than others, so experiment with the following tips to see which you like best.
The burning could be anything from the color of the cupcake tins to the type of oven you have. With baking being such an exact science, it can be complicated to pinpoint what the root cause could be. Each of the following tips can help with fixing these issues.
Double-stack the baking pan
Sometimes the issue is simply that your cupcakes are too close to the heat. This makes the bottoms of the cupcakes bake faster than the rest of the pastry, which often causes burning.
To avoid this, simply put the filled cupcake sheet pan on top of another cupcake baking sheet.
Double stacking your baking sheets will effectively shield the bottoms of your cupcakes from the below heat, making them bake at roughly the same speed and temperature as the rest of your cupcakes.
As a bonus, this neat trick will often also prevent the sides from burning too quickly, as this is yet another all-too-typical issue when baking these delicious little things!
Use a light-colored baking sheet
Dark colors attract more heat than light colors. That is why wearing a black shirt in summer makes you feel much hotter than wearing a lighter-colored shirt.
And guess what; the same thing applies to baking pans!
A darker cupcake pan will heat up faster in the oven, which often results in burnt bottoms.
To fix this issue, switch out your darker-colored pans for lighter-colored ones, like silver or white.
It may take a few extra minutes to bake them, but you’re very likely to skip serving those unpopular bottom-burnt cupcakes!
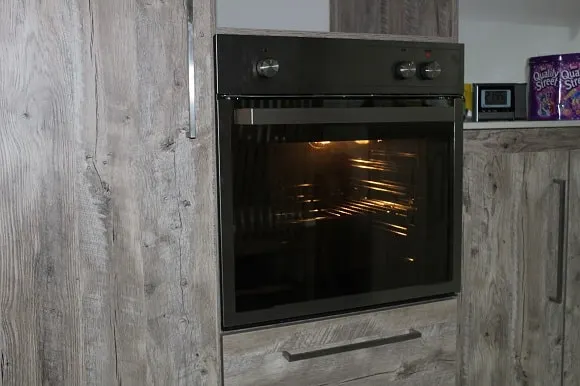
Understand your oven

Yes, baking is an exact science, but it is also precise in ways you sometimes don’t expect.
Baking times could vary significantly depending on your oven’s make, the humidity, or the elevation of where you live.
If you are following the recipe precisely and still getting burnt cupcakes, try adjusting the baking time, even if this might feel counterintuitive.
You may simply not need as much baking time as the recipe suggests for your oven.
Yes, it’s a trial-and-error kind of thing that’ll probably cost you a few rounds of baking cupcakes, but once you’ve gained a better understanding of the oven you’re using at home, results will follow!
Many other issues could be happening with your oven as well. It could, for example, get much hotter than other ovens, or not give off enough heat.
Or maybe some areas in your oven may have more direct heat than others.
Experiment with different locations and sections, and use different temperatures to see if that is what is causing the burnt bottoms.
Knowing your oven better will help you in future baking and cooking ventures!
Line your cupcake tins


Cupcake liners aren’t just for cute decorations. They can also prevent cupcakes from getting burnt.
Similar to the double stacking tip, cupcake liners help give a bit of space between the hot baking sheet and the cupcake and act as a heat shield.
This separation helps stop the cupcakes from baking too fast and sticking to the pan. It’s a simple trick that will make your cupcakes bake much better.
Fill empty baking cups with water
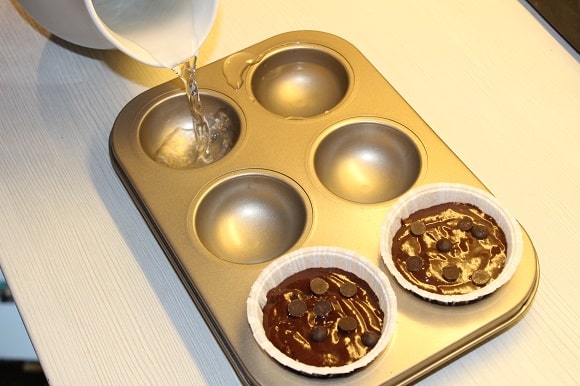

Another simple and effective trick is to pour water into the empty baking cups of your sheet. This can be a good idea whenever there is not enough batter to fill up all of the cups in your cupcake sheet.
It doesn’t always happen, but those cupcakes can sometimes bake very unevenly and either get burnt or remain somewhat raw in the middle.
That’s because the oven’s heat is not evenly distributed if only some cups are filled.
Filling the remaining empty cups with water (about 2/3 of a cup) will ensure even heating and that every one of your delicious cupcakes will come out perfect!
PRO TIP: As a bonus, the added water will also create extra moisture in your oven, making your cupcakes soft and fluffy.
How Do You Keep the Top of Your Cupcake from Burning?
Now that we’ve gone through the bottom part of the problem let’s look at burnt cupcake tops as well!
The main reason the tops of your cupcakes come out all burnt is that your oven may be too hot.
As previously mentioned, not all ovens are built equal, and your model may heat faster or get hotter than other ovens do.
The best way to fix this issue is to buy an oven thermometer. This tool will measure your oven’s temperature better, so you will never have to worry about what temperature your oven actually is.
Oven thermometers are easy to find and relatively cheap, so there is no need for anything excessively fancy or costly.
Another issue could be that your cupcakes are too close to the heating source. Try putting them onto a lower rack, so there is more space between the heat source and the cupcake tops.
What Do You Do With Burnt Cupcakes?
Now you know how to bake cupcakes without burning the bottom, but accidents can still happen from time to time!
Don’t worry about it when they do and don’t throw your burnt cupcakes, either! Because you might still be able to enjoy them!
If the bottom or top is only slightly burnt, you can just scrape off the burnt surface with a spoon or butter knife.
If more of your cupcake’s bottom or top comes out burnt, take off the wrapper and try to cut off the whole burnt part of the cupcake.
PRO TIP: This is best done with a serrated knife, which is perfect for cutting through hard exteriors and soft interiors.
You’ll most likely end up with a substantially smaller cupcake or a flat top, but once you put on that topping, no one will notice!
And it still beats throwing your cupcakes into the trash if you ask me!
The only time I would choose the trash bin is when the entire cupcake comes out all burnt and black. Then, there is really no saving it!
At What Temperature Should You Bake Cupcakes?
For the best result, your cupcakes should bake at a temperature of about 340 to 360F.
Ideally, all cupcakes should be baked at a temperature of 350F, but as mentioned above, baking heat and speed will often vary from oven to oven.
For your cupcakes to rise properly, preheat your oven before putting them in.
If you prefer a dark-colored sheet for your cupcakes, reduce the temperature by about 25F!
PRO TIP: As previously discussed, dark sheets will absorb more heat, and a 25F or so heat reduction will prevent your creations from getting burnt!
Bake the cupcakes for 15 to 20 minutes or until a toothpick comes out clean when inserted in the middle.
PRO TIP: If you’re into baking mini cupcakes, they generally won’t need more than 10 to 12 minutes in the oven!
Where Do You Bake Cupcakes in the Oven?
The best place to bake cupcakes is in the middle of the oven. Place your rack in the center of the oven before preheating, then place the cupcakes right in the middle of that rack.
Cupcakes need an even distribution of heat to bake properly. Different parts of the cupcake may burn if it isn’t in the middle.
An excellent way to remember which section in the oven to bake something on is to think about where the heat should be.
When baking goods that need a crispy bottom (i.e., pizza), you want to place them on the bottom rack.
For the opposite effect, place the baked goods on the top rack for a crispy top. This is great for treats like pies.
When you need to bake something that’s fluffy throughout and doesn’t need any “crisping,” the center rack will almost always be your best bet.
This will make sure the pastry is fully baked without any burning.
Related Articles
- Why Do Cupcakes Crack on Top?
- Can You Eat Muffin Liners? (My Husband Tried it Out)
- 5 + 1 Best Ways to Eat Muffins
Leave a comment